


Testing the Nolej tool
Development of AI-assisted micro-learning activities
A trial of the Nolej tool is currently underway as part of the Isère TNE initiative. From spring 2025, 200 teachers, trainers and inspectors will take part in this one-year trial. But what is Nolej and what is the tool used for? Read on to find out more.
What is Nolej?
Winner of the GESA Global EdTech Start-up Award at the BETT show in London, Nolej is both the name of the company and the name of the product it is developing.
It is a website that enables users to create micro-learning activities using artificial intelligence. Starting with a web page, a text or a video, the tool generates a digital activity that can be exported in various formats, including H5P.

H5P what?
H5P is a format for interactive digital content, and the software used to create it is open-source. People often confuse the name of the software with the file extension of the files it produces.
H5P makes it easy to create educational resources such as quizzes, interactive videos or dynamic presentations. This format is designed to be embedded in websites or learning platforms such as a digital learning environment (DLE), Moodle/ELEA, Magistère…
Please note that the results/scores achieved in an H5P activity can be integrated into a Moodle/ELEA course.
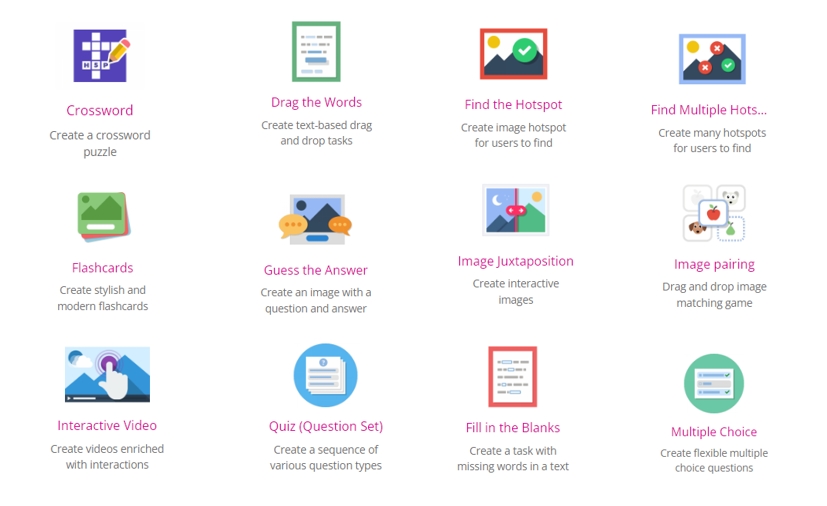
To date, there are no fewer than 54 types of activities that can be created in H5P (click on the activity name to see an example): flashcards, multiple-choice questions, quizzes, image matching, crosswords, finding a point on an image, memory games…
It is possible to customise and configure every single one of them down to the smallest detail. This is a real strength… but it can quickly become complex and time-consuming to create them 😮
And that’s exactly where… Nolej comes in 😃
Creating a Nolej module: A step-by-step guide?
The Nolej platform has been updated! The basic principle remains the same: using artificial intelligence to analyse your content and automatically generate interactive activities. This updated tutorial guides you through the new steps to easily create your own custom H5P modules.
Part 1 : Preparing the Module
1.1 Start creating
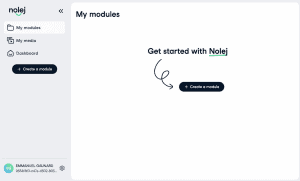
It all starts on your Nolej dashboard. In the “My modules” section, simply click the “+ Create a module” button to start the process of creating a new interactive learning resource.
1.2 The 3 key steps
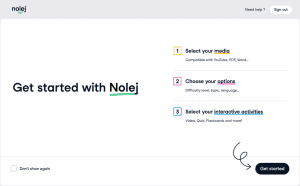
Nolej then guides you through a clear three-step process to transform your documents into interactive learning materials:
- Select your media (the content that will form the basis).
- Choose your options (to tailor the teaching approach).
- Select the interactive activities to be generated.Click on “Start” to begin the first step.
Part 2 : Step1 – Media Selection
2.1 Selecting sources
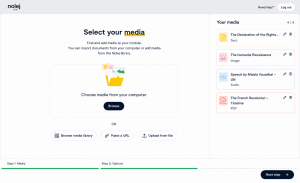
This is the crucial stage where you supply the raw materials to Nolej. You can:
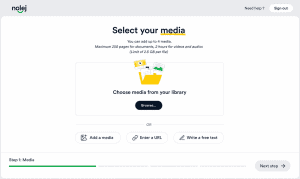
- Add media: upload files from your computer (PDF, DOCX, PPTX, as well as audio or video files, which Nolej will transcribe).
- Enter a URL: link to a web page or an online video (YouTube, Dailymotion, etc.).
- Enter text: copy and paste or type your content directly.
- Choose from the library: Reuse media that has already been imported.
As of today (May 2025), you can combine up to four different sources.
Please note: Nolej relies solely on the content you provide and does not seek any external information. The quality and richness of your sources will determine the relevance of the activities generated!
2.2 Add media
As you add your sources (in this case, a video, a web link, a document and a PDF), they will appear in the panel on the right. You can add up to four in total. Once you have made your selection, click “Next step”.
Warning: Nolej will ask you to confirm your choice, as you will no longer be able to change the sources for this module afterwards.
Part 3 : Step2 – Selecting Options
3.1 Set the general settings
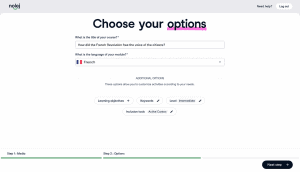
Once you have verified your sources, move on to the module options. Start by setting your course title and the main language of the content.
Under “Additional options”, you will find settings to fine-tune the artificial intelligence and better adapt the module to your teaching context.
3.2 Specify the objectives and the level
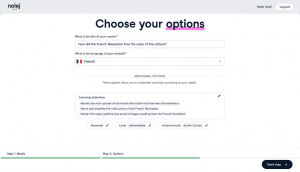
This is where you can fine-tune the AI:
- Learning objectives: Describe what learners should be able to do after completing the module.
- Keywords: Add important terms (not currently implemented in this version of Nolej).
- Level: Select the difficulty level (Easy, Medium, Hard) via the dedicated window (see screenshot opposite). This will influence the complexity of the generated activities (for example, the type and number of questions in a quiz).
- Inclusion tools: Enable accessibility options if necessary.
The more detailed these options are, the more relevant the content generated by Nolej will be to your expectations.
Part 4 : Step 3 – Selecting Activities
4.1 Choose the types of activities
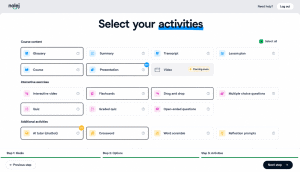
The final step before generation! This is where you choose the formats and types of interactive exercises that Nolej will create for you. The list is extensive and organised by category:
- Course materials: Glossary, Summary, Transcript (if audio/video source), Outline, Lecture notes (structured text), Presentation…
- Interactive exercises: Interactive video (if video source), Flashcards, Drag-and-drop (fill-in-the-blanks), Multiple-choice questions, Quizzes (formative or assessed), Open-ended questions…
- Additional activities: Learning chatbot, Crosswords, Word searches, Brainstorming workshops…
Select the activities that best suit your learning objectives (in this case: Lessons, Glossary, Flashcards, Drag and Drop, Quiz) and then click “Next”.
4.2 Launch of the new generation
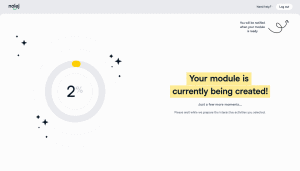
Once you’ve chosen your activities, Nolej will start creating your module. The artificial intelligence analyses your sources based on the options you’ve selected and builds the various activities. The process usually takes a few minutes (often less than 3 minutes, but this depends on the size and complexity of your sources). Please wait whilst the process is running!
4.3 Module ready!
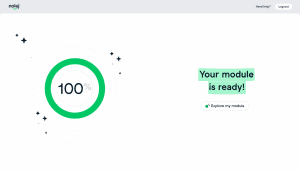
There you go! Once the module has been generated, Nolej will let you know. You can now access all the content and activities created by clicking on “Explore my module”.
Part 5 : Modification and Customisation
5.1 Explore the generated module
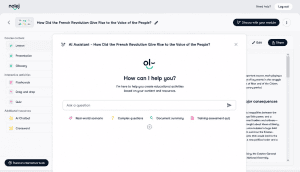
Once your module has been generated, Nolej provides an interface that allows you to navigate easily between the various activities you have created (lessons, glossary, quizzes, etc.) using the menu on the left. Each section includes ‘Edit’ or ‘Share’ buttons. You will also find help tools, such as the ‘Teaching Assistant’, to further refine your content.
5.2 Edit an activity (Example: Glossary)
Are you wondering if it’s possible to edit the content generated by the AI? Yes, absolutely: you retain editorial control.
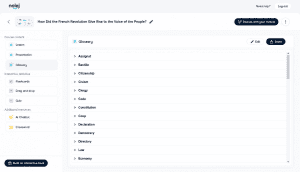
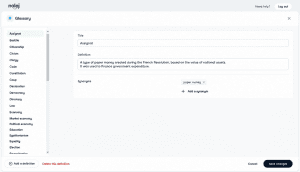
Simply select the activity you wish to edit from the left-hand menu (for example, the “Glossary”). You will then see the content generated for that section. Look for the “Edit” button (pencil icon) in the top right-hand corner to start making your changes.
5.3 Edit content
The editing interface will then open. Here, in the glossary example, you can correct a definition, edit a term, add synonyms, delete an entry or even add a new one manually.
This principle applies to other types of activities: you can rephrase quiz questions, change the correct/incorrect answers, delete questions, adjust the summary, etc. You can tailor the content precisely to your objectives. Don’t forget to click on “Save changes”!
Part 6 : Export to H5P
6.1 Creating the interactive booklet
Once you are happy with your various activities (whether you have edited them or not), you can export them.
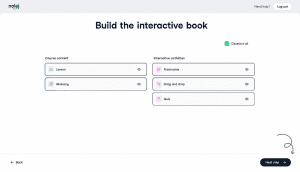
Rather than exporting each activity separately (which is possible via the “Share” button on each activity), Nolej offers a very handy feature: “Build the interactive book”.
Click this button (bottom left) to go to a screen where you can choose which activities (from those generated and available) you wish to combine into a single H5P file.
6.2 Select the H5P format and download
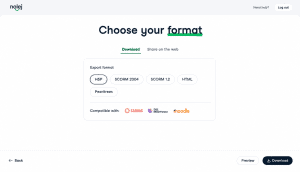
Once you have selected your activities and clicked on “Next step”, you will be taken to the final export screen. Under the “Download” tab, you will see a choice of formats. Of course, select “H5P” to obtain the valuable standardised file, which is compatible with many platforms (ELEA/Moodle, ENT, etc.). You can then click on “Preview” or directly on “Download” to retrieve your H5P file.
Note: Other formats such as SCORM (for LMS platforms), PDF or HTML are also available. If you wish to further refine your H5P file after exporting it, you can use free software such as Lumi or Logiquiz from La Digitale.
Note : D’autres formats comme SCORM (pour les plateformes LMS), PDF ou HTML sont également disponibles. Si vous souhaitez encore peaufiner votre fichier H5P après l’export, vous pouvez utiliser des logiciels gratuits comme Lumi ou Logiquiz de la Digitale.
Part 7 : Integration and Example
7.1 Use the H5P file
Congratulations! You now have an H5P file containing your “interactive booklet”.
This file is an open standard: you can embed it directly into learning platforms that support it, such as:
- Your digital learning environment
- ELEA/Moodle
- Magistère
- Other LMS platforms or websites compatible with H5P.
If you don’t use any of these platforms, don’t panic! Free online services such as Digiquiz (provided by La Digitale) allow you to easily host your H5P file and obtain a direct link or an embed code (iframe) to share it.
7.2 Example of a result
To conclude this article, here is the H5P “Interactive Booklet” (containing the Lesson, Glossary, Flashcards, Drag-and-Drop and Quiz activities) that we have generated and exported. It is embedded directly into the page below using an iframe code provided by the Digiquiz hosting service.
As you can see from this example and tutorial, Nolej, powered by artificial intelligence, offers a powerful and quick way to create a variety of interactive activities in the standard H5P format (or others) using your own source content, whilst allowing you to refine and customise the final result so that it perfectly meets your teaching needs.
This case study is taken from the Isère Digital Education Portal (here).